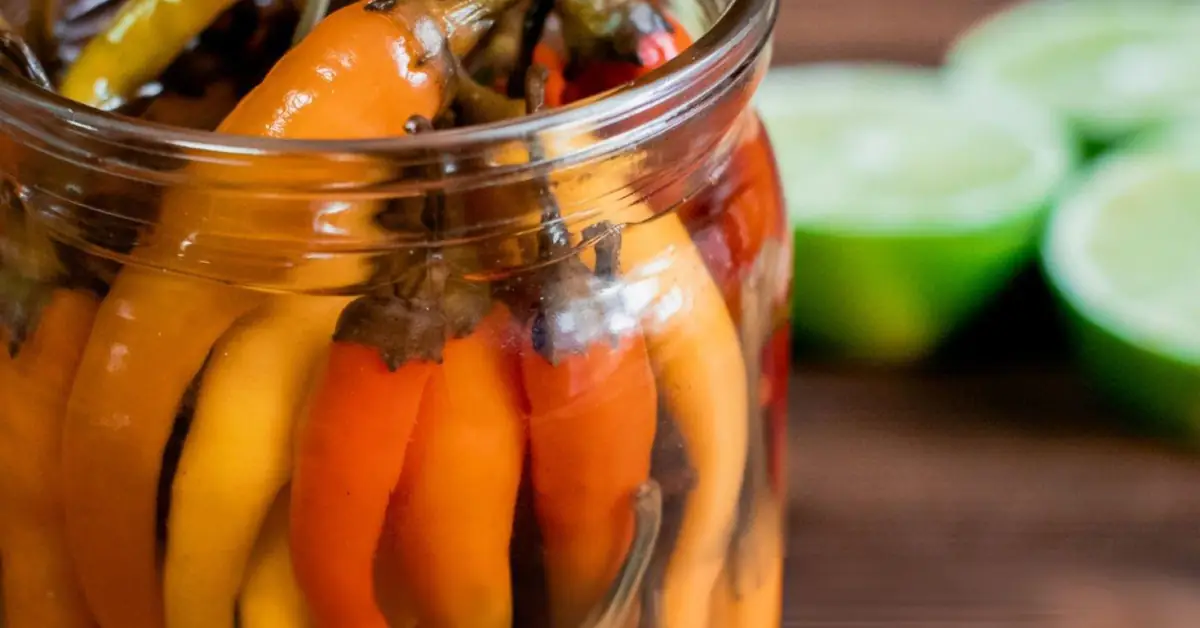
Spicy Pickled Okra: A Flavorful Journey
This Spicy Pickled Okra recipe is a delightful way to preserve fresh okra, adding a zesty kick to your meals or serving as a tasty snack. This comprehensive guide will walk you through each step, ensuring you create your own batch of crunchy, flavorful pickles. From selecting the perfect okra to achieving that perfect crunchy texture and vibrant spice, this recipe is designed for both beginner and experienced canners alike. Get ready to elevate your culinary game with this simple yet rewarding recipe.
Ingredients
- 2 pounds fresh young okra (2- to 3-inch pods are best)
- 1 quart white vinegar (5% acidity is recommended for safe canning)
- 6 tablespoons Kosher salt (Kosher salt is preferred for its consistent grain size)
- 8 cloves garlic, peeled (use fresh garlic for the best flavor)
- 16 fresh hot peppers (such as Tabasco or Serrano, adjust to your spice preference. Consider wearing gloves when handling hot peppers)
- 1/3 cup whole mustard seed (adds a pleasant bite and texture)
Instructions
Step 1: Prepare the Okra
- Wash the okra thoroughly under cold running water. Remove any dirt or debris.
- Trim the stem ends of the okra, leaving at least 1/3 inch of the cap intact. Removing too much of the stem can lead to the okra becoming mushy during the pickling process.
- Inspect each okra pod carefully and discard any that are damaged, bruised, or show signs of spoilage. Using only the freshest, highest quality okra will result in the best-tasting pickles.
Step 2: Soak the Okra
- Soak the trimmed okra in ice water for one hour. This step helps remove excess slime and contributes to a crispier final product. Ensure the okra is fully submerged in the ice water.
- After soaking, drain the ice water thoroughly and pat the okra pods dry using clean kitchen towels or paper towels. Thoroughly drying the okra is crucial to prevent unwanted moisture in the jars.
Step 3: Jar the Okra
- Divide the okra evenly between four or five pint-sized sterilized canning jars. Using pint-sized jars allows for easier handling and processing. Make sure the jars are properly sterilized to prevent bacterial growth and ensure safe storage.
- Pack the okra tightly, but avoid overcrowding. Leave about 1/2 inch of headspace at the top of each jar. Overcrowding can lead to mushy pickles and impede the pickling process.
- Arrange the okra cap side down in the jars. This helps maintain the shape and prevents the okra from becoming overly soft.
Step 4: Make the Brine
- In a large enameled pot (non-reactive is best to avoid discoloration), combine the white vinegar, Kosher salt, peeled garlic cloves, hot peppers, and whole mustard seeds. An enameled pot is ideal because it won't react with the acidic brine.
- Bring the mixture to a rolling boil over medium-high heat. Stir occasionally to ensure the salt dissolves completely.
- Reduce the heat to a gentle simmer and continue to simmer for about five minutes. This allows the flavors to meld and infuse the brine with rich aromatic notes.
Step 5: Fill the Jars
- Carefully divide the hot peppers, garlic cloves, and mustard seeds evenly among the jars of okra. Distribute them evenly to ensure a consistent flavor throughout each jar.
- Using a ladle or a large spoon, carefully pour the hot pickling liquid over the okra in each jar, leaving at least 1/4 inch of headspace (this is crucial for safe canning and preventing jar breakage during processing).
- Remove any air bubbles by gently running a non-metallic utensil (like a clean chopstick or a thin, blunt knife) around the inside of each jar.
Step 6: Seal the Jars
- Wipe the rims of the jars clean with a damp cloth to remove any spilled brine or food particles that could prevent a proper seal.
- Place the lids on the jars and screw the bands on firmly, but avoid over-tightening. Over-tightening can prevent proper sealing.
Step 7: Process the Jars
- Carefully place the filled jars in a large canning pot or water bath canner. Ensure the jars are covered by at least 1-2 inches of water.
- Bring the water to a rolling boil, then reduce the heat to maintain a gentle boil for ten minutes (adjust processing time based on your altitude—higher altitudes may require longer processing times; consult a reliable canning resource for altitude adjustments).
- After ten minutes, carefully remove the jars from the boiling water using a jar lifter. Avoid touching the jars directly as they will be extremely hot.
- Let the jars cool completely undisturbed on a towel-lined surface for at least 12-24 hours. You should hear a "pop" sound as the jars seal. This indicates that a vacuum seal has formed.
Step 8: Mature the Pickles
- Allow your pickles to mature for at least four weeks in a cool, dark, and dry place. This allows the flavors to fully develop and deepen. The longer they sit (within reason), the better they taste!
- Check the jars periodically to ensure that the seals remain intact. Any jars that do not seal properly (no "pop" sound, lid can be easily depressed) should be refrigerated and consumed within two weeks to prevent spoilage.
Cooking Time
- Prep Time: 1 hour (including soaking time)
- Cook Time: 15 minutes (for simmering the brine)
- Processing Time: 10 minutes (in boiling water bath)
- Total Time: Approximately 4 weeks for maturation before consumption
Nutritional Information (per serving)
Note: Nutritional information is an estimate and may vary based on the specific ingredients used.
- Calories: Approximately 25
- Total Fat: 0g
- Sodium: 300mg
- Total Carbohydrates: 5g
- Dietary Fiber: 2g
- Sugars: 0g
- Protein: 1g
Recipe Yield
This recipe yields approximately 4 to 5 pint jars of spicy pickled okra.
Recipe Category
- Category: Condiment
- Cuisine: Cajun/Creole
Dietary Restrictions
This recipe is gluten-free and suitable for vegetarian diets.
Instructions for Variations
- For Sweet Pickled Okra: Add sugar to the brine mixture (approximately 1 cup, adjust to taste) to create a sweeter version. Start with a smaller amount of sugar and add more to your preference.
- For Extra Heat: Include additional hot peppers or use spicier varieties like ghost peppers (handle with extreme caution) for those who love intense heat. Remember to adjust based on your spice tolerance.
- Herb Infusion: Add fresh dill, thyme, or a combination of herbs to each jar for an herbal flavor twist. Add the herbs during Step 5, along with the garlic and mustard seeds.
- Garlic Lover's Version: Double the amount of garlic for a more intense garlic flavor. Adjust to your preference.
- Spice Blend Experiment: Create your custom spice blend by adding other spices such as black peppercorns, red pepper flakes, or celery seeds. This adds a layer of complexity and unique flavor to your pickles.
Preparation Method
This recipe uses a boiling-water canning method to preserve the okra safely while enhancing its flavor through pickling. Always prioritize safe canning practices and follow recommended guidelines to avoid foodborne illnesses. Refer to a reliable canning resource for detailed information on safe canning procedures.
Enjoy your homemade spicy pickled okra as a crunchy snack, a vibrant addition to salads, a zesty side dish, or a flavorful topping for your favorite dishes! The possibilities are endless!
Tips for Success
- Choose Fresh Okra: Select young, tender okra pods for the best texture and flavor. Avoid okra pods that are large, woody, or have blemishes.
- Adjust Spices: Feel free to customize spices based on your taste preferences—add more garlic, reduce the peppers for less heat, or experiment with different herbs to create your own unique flavor profile.
- Use Clean Equipment: Ensure all utensils, jars, lids, and bands are thoroughly cleaned and sterilized to prevent contamination and ensure a successful canning process. Sterilizing the equipment is crucial for food safety.
- Proper Headspace: Leave the correct headspace (usually 1/4 to 1/2 inch) in the jars to allow for expansion during processing and to avoid overflow. Insufficient headspace can lead to unsafe canning practices.
Common Mistakes to Avoid
- Overcrowding Jars: Avoid packing too many okra pods into one jar; this can prevent proper brining and lead to uneven pickling and potential spoilage.
- Skipping Sterilization: Always sterilize jars, lids, and bands to prolong shelf life and maintain food safety. This is a crucial step for safe home canning.
- Ignoring Headspace: Leave adequate headspace in jars; too little can cause brine overflow during processing and potentially lead to improper sealing.
- Using the wrong type of vinegar: Use only distilled white vinegar with 5% acidity for safe canning. Other vinegars may not have the necessary acidity to prevent spoilage.
- Improper sealing: Make sure the jars are properly sealed after processing. Check for the characteristic "pop" sound. Unsealed jars need to be refrigerated and consumed quickly.
This pickled okra recipe is not only easy to follow but also allows you to enjoy a healthy, flavorful snack. Perfect for salads, as a side dish, or straight from the jar! Enjoy the fruits (or rather, vegetables!) of your labor!


